
If you already read the previous post about Woo Choice Plugin, then I guess you are well aware of Woo Choice Plugin (if not, then you can read here). If we move further in detail, then Woo Choice Plugin has many bonus features to offer.
So, today, I will provide more information about Woo Choice Plugin, or specifically, I will talk with you about some bonus features of this plugin.
So what will be that Bonus feature?
There are many bonus features available in the WooChoice Plugin, but today, I’m going to talk about only two main bonus features, that are:
- Filter for shop/catagory page.
- The shortcode filter.
Filter for shop/Catagory page
Filters for Shop/Category Page provides features of Product Filter on Shop Page and Category Page. This plugin module contains advanced tools that make it easier to create a Product Filter on Shop Page and Category Page. And, all these filters are ajax based.
This feature also helps to create the customized diamond search page with advanced filter widgets. For example, if you are in the Diamond/Jewelry industry and if you want to create the diamond feed page, then this plugin is a perfect choice for creating a customizable diamond feed page while adding unique bonus features.
This feature allows you to choose any data source for the product’s filter, For example, categories, attributes, manual input, taxonomies, Product Price, and so on for the product’s filter.
This bonus feature provides all kinds of UI elements like Buttons, Buttons with multi-selects, sliders, Dropdowns, Dropdowns with Icons, and of course Icon and Icons with multi-selects swatches. You can also use the horizontal styled filter to create your Shop/Category page widgets. It also provides a variety of alternate UI/UX widgets for the Shop/Category page.
Step 1: Installation
First of all, you need to install the Woo Choice Plugin and follow the installation guide here.
During installation, you will see Set-up Wizard, which is divided into three steps that are,
- Inventory
- Features
- Sample Data
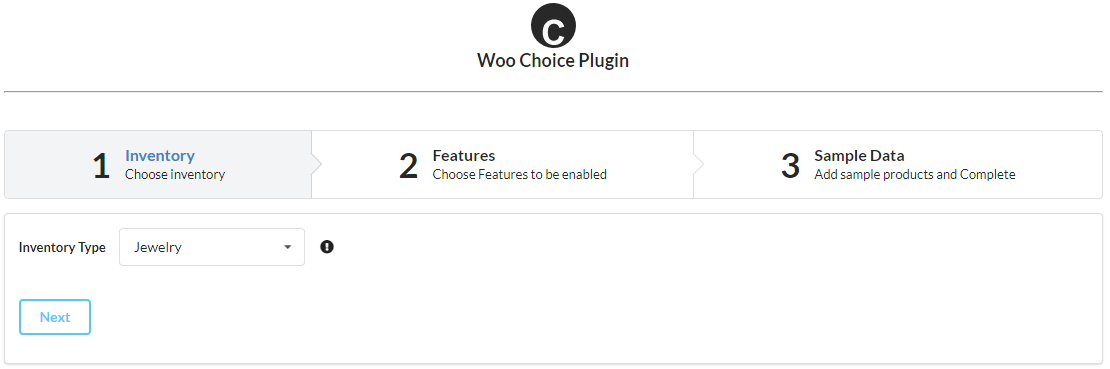
In the Inventory,
Select the Jewelry, Click on it, and Next.
(There are other options available, but just select Jewelry)
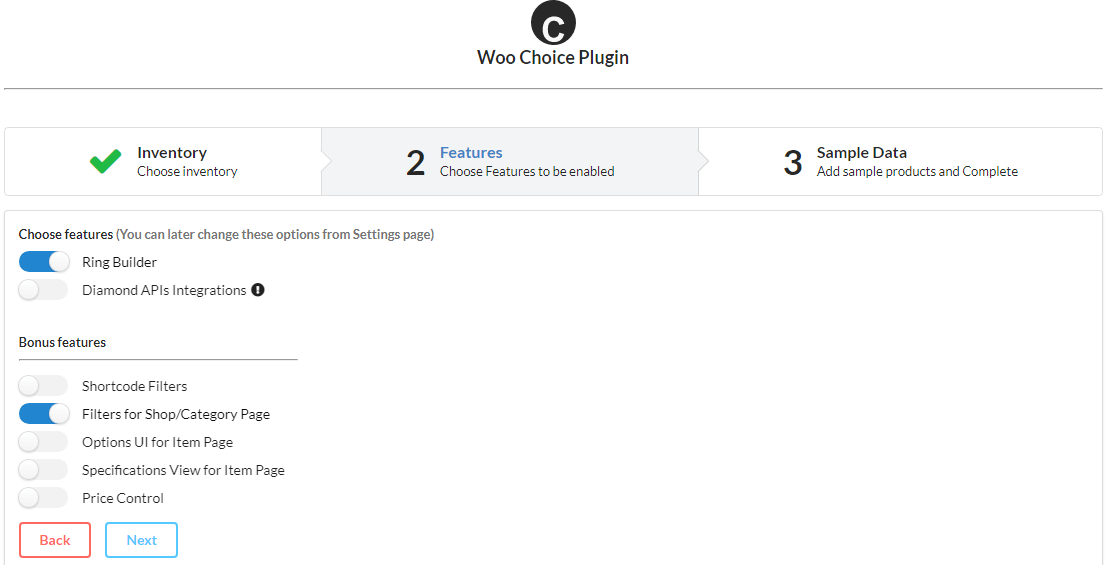
The next step is Features.
In the Features, Enable Ring Builder and Filters for Shop/Category Page, and
Click on the next.
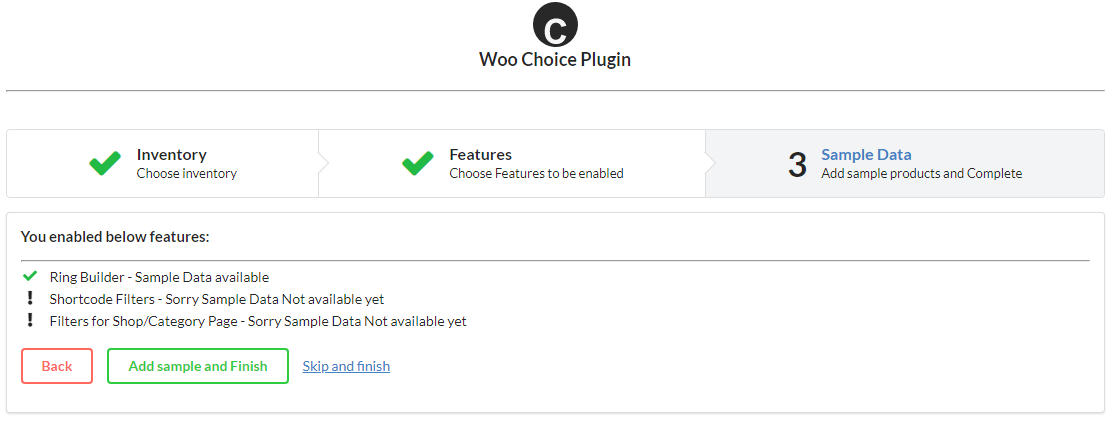
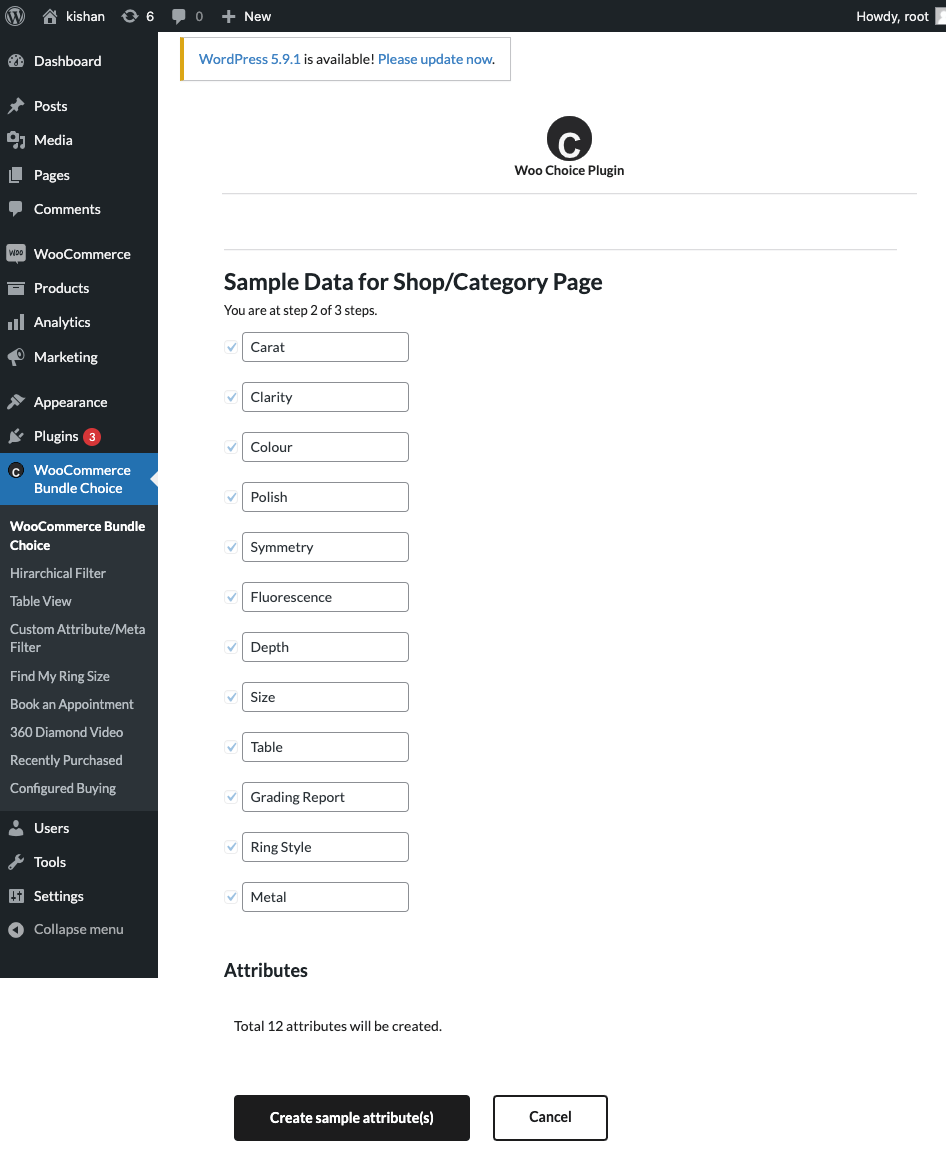
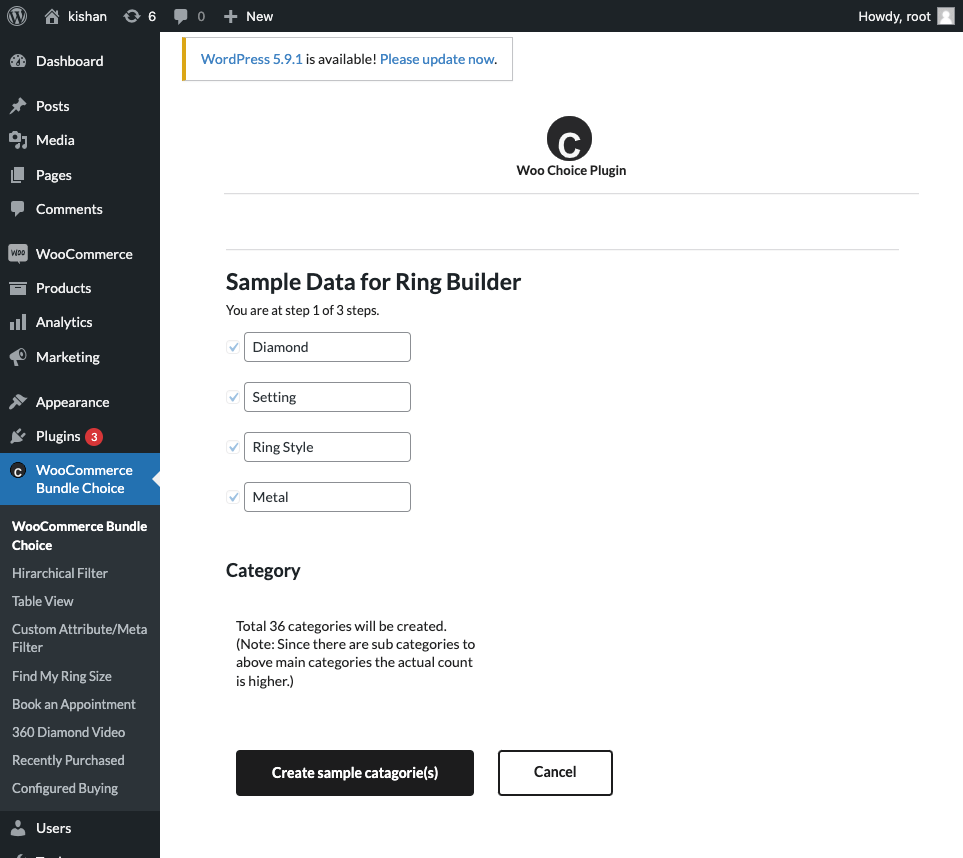
Now, in the last step, as you can see in the below image, there is no sample data available for the Shop/Category Page.
Note that, add the Ring Builder sample data when you install the plugin. Since we don’t have Shop/Category Page filter sample data available yet ( we will publish it in upcoming updates), so adding Ring Builder sample data is a recommended way to set up easily.
Otherwise, you can Skip and finish the step and add data on your own
But the process will take time.
Just click on Add sample and Finish, then you just need to add sample data and configuration.
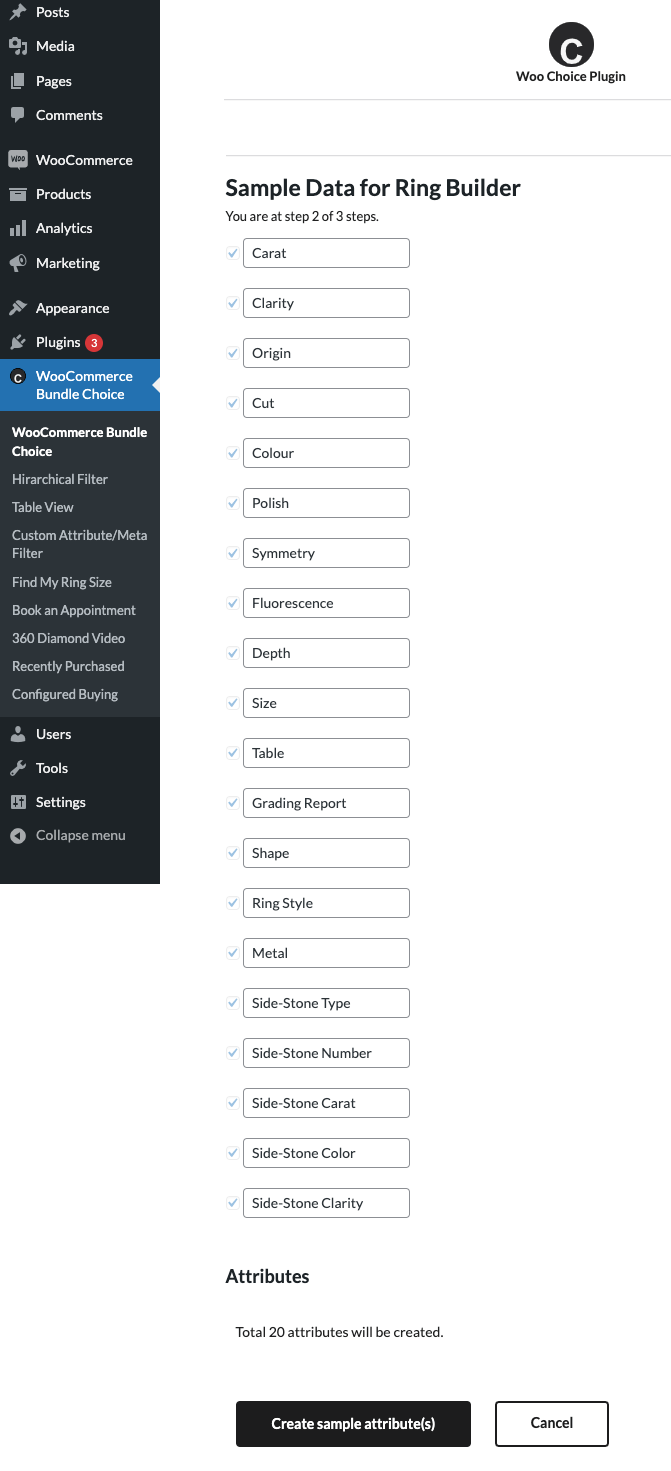
Step 2: Adding the sample data
While adding the sample data, there will be 3- steps.
In the first step, create sample categories.
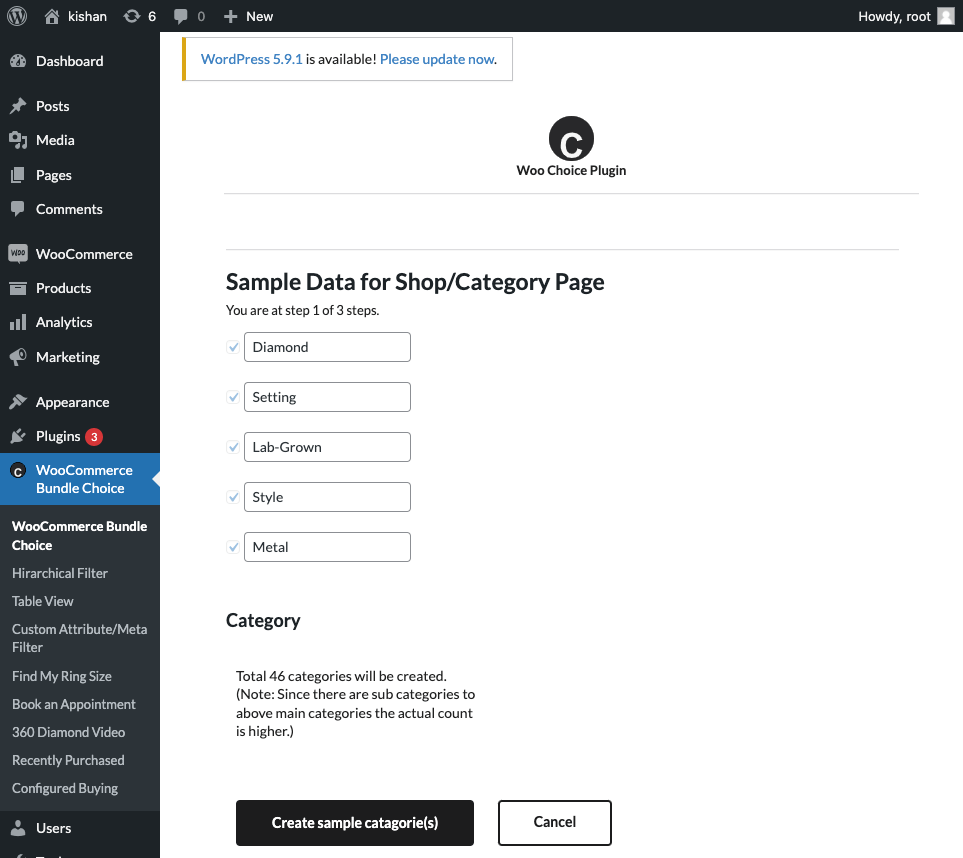
And in the third step, create products.
Step 3: Filter for Shop/Category Page and their Configuration
After adding the sample data of the Ring builder, you will still need to do some configuration for Shop/Category Filters.
Let me guide you through that,
Now follow the below instructions(Refer to snap provided below while following instructions):
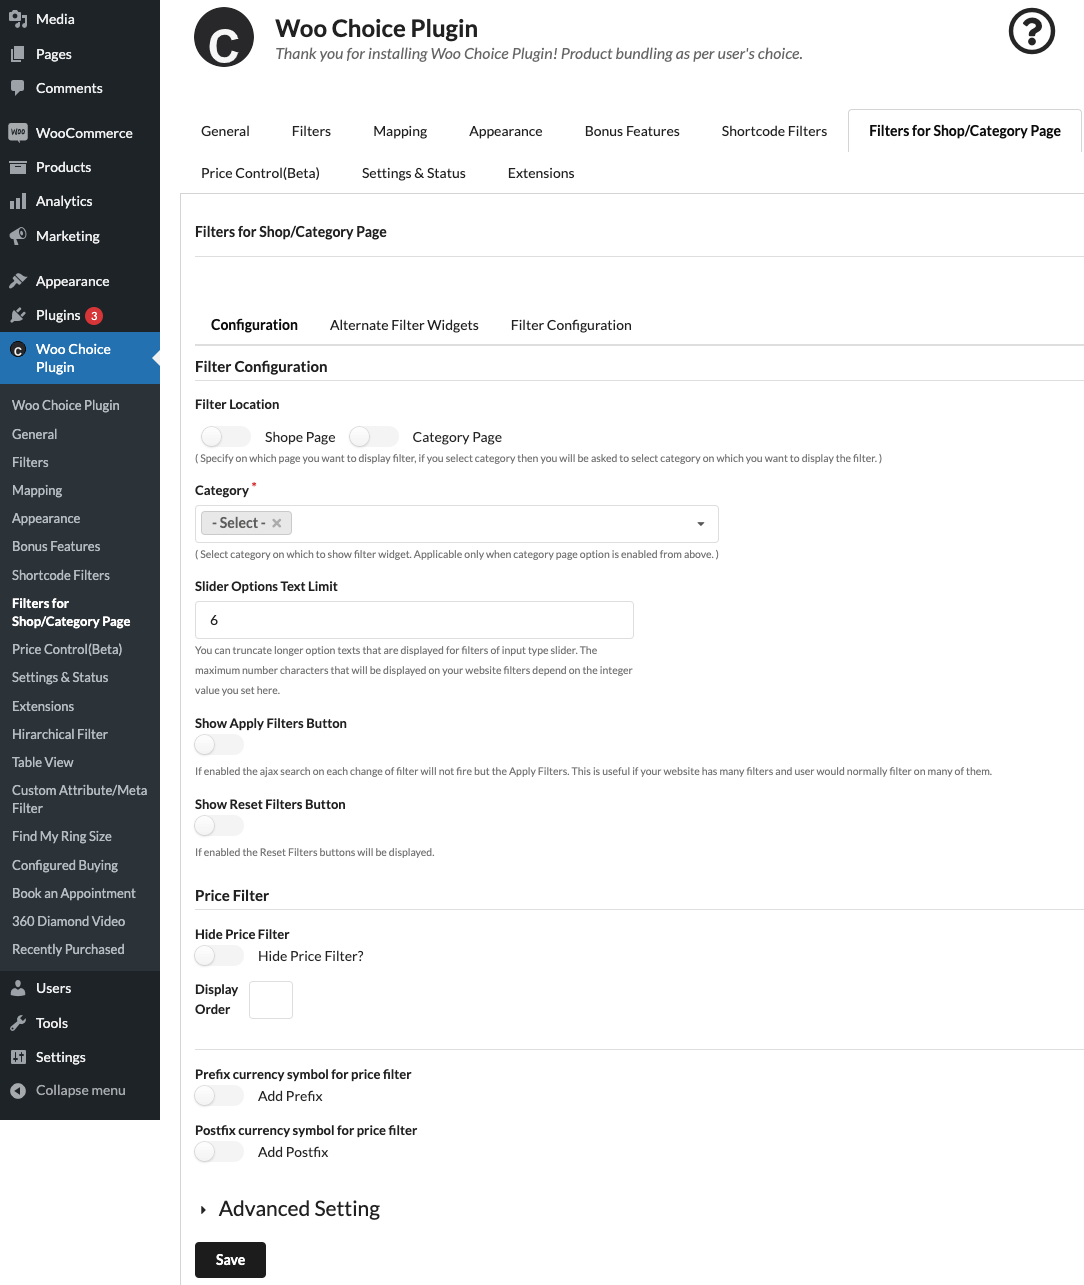
- After going to the Admin page, click on the “Filters for Shop/Category Page” tab and click on the “Configuration” sub-tab.
- Enable the “Category Page” switch
- Select any category under the category dropdown on which you want to show this filter.
- Save the changes

Step 4: Some other Configuration
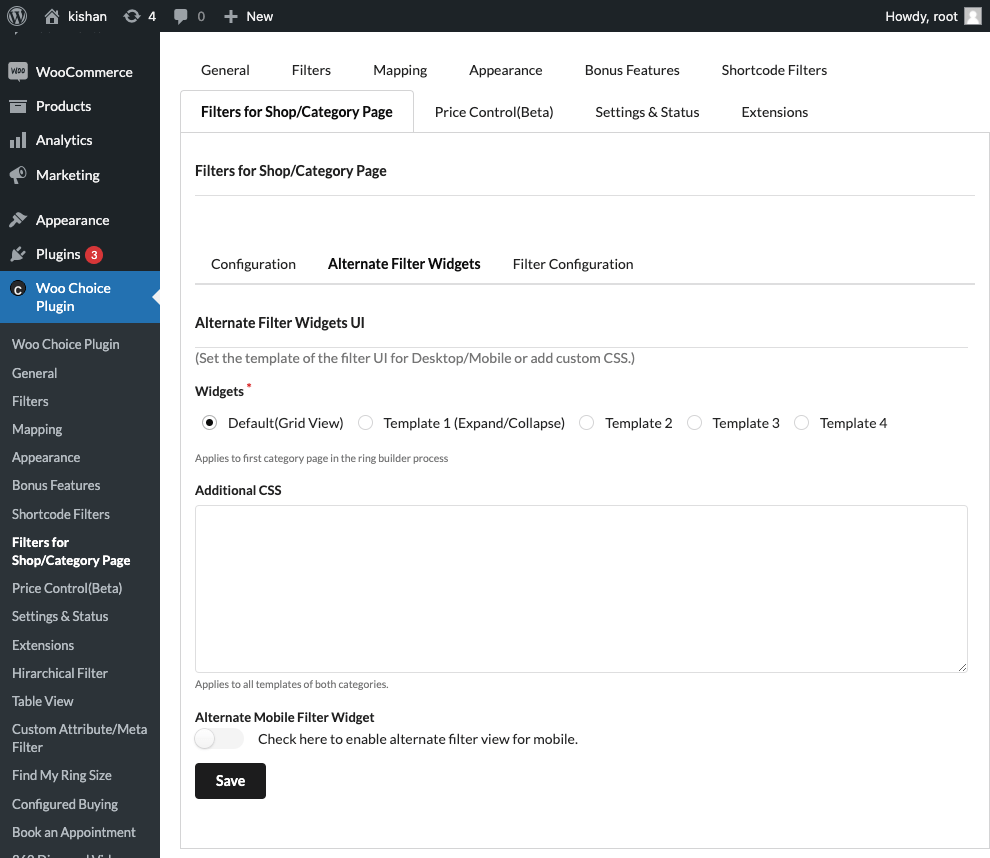
Alternate Filter Widgets:
- To view the filter with the sample data with Alternate widgets, go to “Alternate Filter Widget” and under the “Widget” field, select the “Template 3” or any other that you may like.
- Save the changes and visit the category page to view the change in UI/UX widgets.
How to add/edit filter fields,
On the Filter for Shop/Category page
- Go to the “Filter Configuration” sub-tab.
- At the bottom, there is the form “Add Filter Field” to add filters.
- To edit the filters click on the blue link, which is visible on the table.
Step 5: Advanced configuration
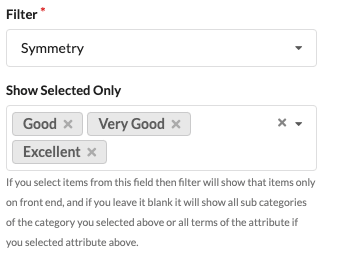
What if you want to show the selected option only?
Let’s take an example of Symmetry, let’s assume that you want to show some selected options only then you do so by following the below image.
Like the above configuration, there are plenty of other configurations available for the Shop/Category Filters.
Shortcode Filter For WooCommerce
The Shortcode filter is the other bonus feature that I’m going to talk about today. You can use this filter to insert live search, live filtering inside any page, and it provides shortcodes to build a dynamic shop page. You can create customizable shortcode filters with the filter of any input type anywhere on any webpage.
The Shortcodes make it a lot easier for you to work with graphical content and other functionality even if you have limited technical knowledge or no knowledge at all. If you do not know how to use shortcodes, then refer to this guide.
Shortcodes are very similar to widgets, you can choose to use widgets, but shortcodes give you the advantage of using shortcodes anywhere on any page. It also works for the call-to-action filter anywhere on your landing pages.
Step 1: Installation
First of all, you need to install the Woo Choice Plugin and follow the installation guide here.
During installation, you will see Set-up Wizard, which is divided into three steps that are,
- Inventory
- Features
- Sample Data
In the Inventory,
Select the Jewelry, Click on it, and Next.
(There are other options available, but just select Jewelry)
The next step is Features.
In the Features, Enable Ring Builder and Shortcodes Filters, and
Click on the next.
Now, in the last step, as you can see in the below image, there is no sample data available for the Shortcode Filters.
Note: Add the Ring Builder sample data when you install the plugin. Since we don’t have the Shortcode Filters sample data available yet ( we will publish it in upcoming updates), so adding Ring Builder sample data is a recommended way to set up easily.
Otherwise, you can Skip and finish the step and add data on your own
But the process will take time.
Just click on Add sample and Finish, then you just need to add sample data and configuration.
Step 2: Adding the sample
While adding the sample data there will be 3- steps.
In the first step, create sample categories
In the second step, create sample attributes data.
And in the third step, create a total product category.

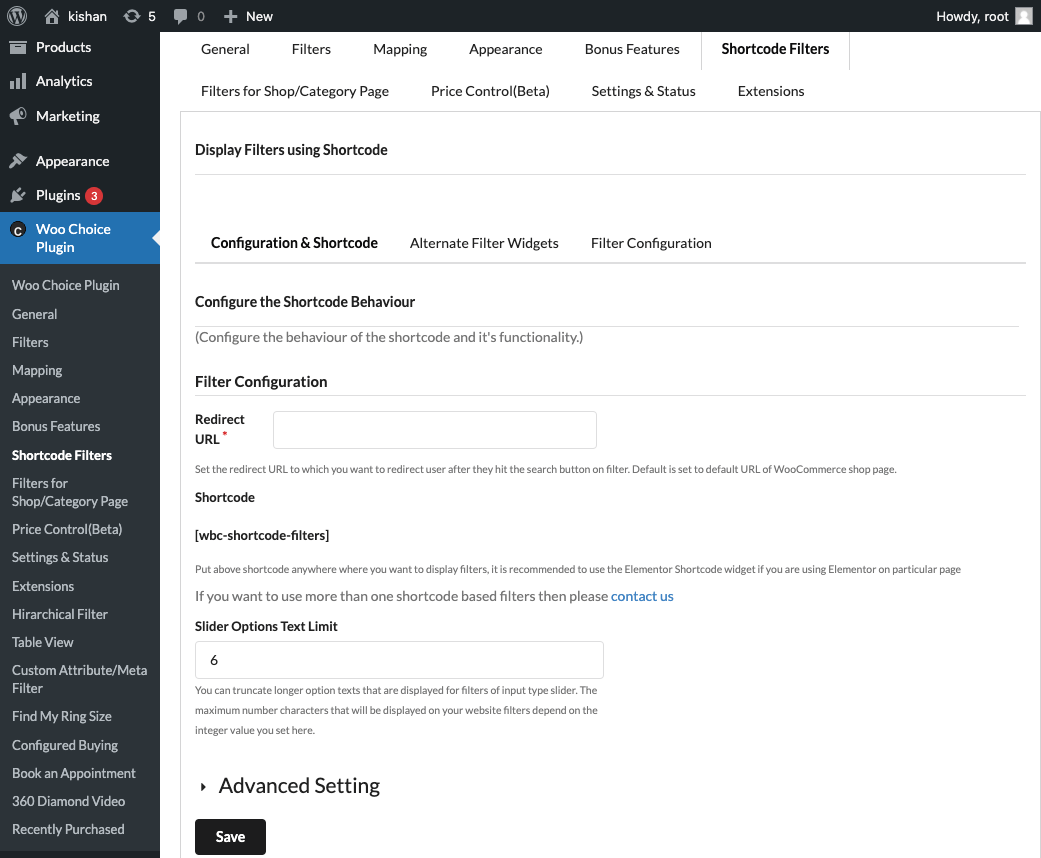
Step 3: Configuration of The ShortCode Filter
After adding the sample data of the Ring builder, you will still need to do some configuration for the ShortCode Filters.
Let me guide you through that,
Now follow the below instructions(Refer to snap provided below while following instructions):
- After going to the Admin page, click on the “ShortCode Filters” tab and click on the “Configuration & ShortCode” sub-tab.
- Set the redirect URL, if you want to redirect users to a specific page after they click on the search button
- Copy the Shortcode provided underneath the URL field and paste it on anywhere webpage where you want to show filter
- Save the changes.
Step 4: Some other Configuration
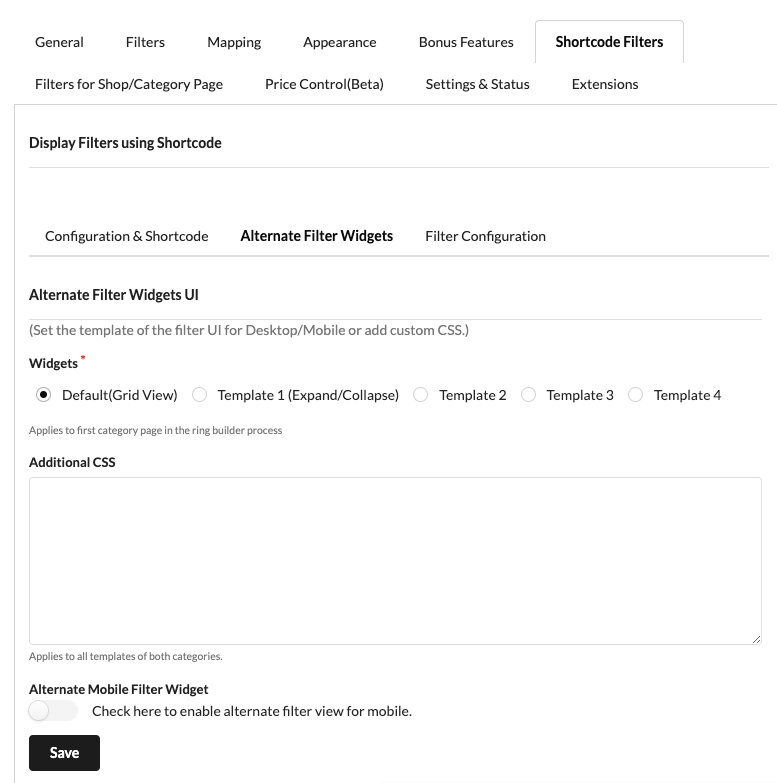
Alternate Filter Widgets
- To view the filter with sample data with Alternate widget, go to “Alternate Filter Widget” and under the “Widget” field select the “Template 3” or any other that you may like.
- Save the changes and visit the category page to view the change in UI/UX widgets.
How to add /edit filter fields
Lastly, on the Filter for the Shortcode Filters, you need to set up the Filter Configuration
- Go to the “Filter Configuration” sub-tab.
- At the bottom, there is the form “Add Filter Field” to add filters.
- To edit the filters click on the blue link, which is visible on the table.

Like the above configuration, there are plenty of other configurations available for the Shortcodes Filters.
Things that matter:
Being in the diamond industry, sometimes you need a large inventory for your product on your website. For that reason, we provided an extension to solve such problems. If you have requirements regarding the large inventory then, you can use the Diamond APIs Integration extension.
Diamond APIs Integration extension is used to integrate all Diamond APIs like Rapnet Instant Inventory API, Direct API Providers (Glow Star Diamond API, JB Diamond API, SRK Diamond API) and Others (DEX (International Diamond Exchange API), MID House of Diamonds API, POLYGON Virtual Inventory API, GEMFIND Diamond Link API, VDB (Virtual Diamond Boutique API), JewelCloud API). It provides the feature of handling a large inventory with 100k diamonds or more than 100k products without losing the site’s speed.
I hope you understand all the things about bonus features, and regrading it, if you have any queries related to this article and Woo Choice Plugin, you can contact us here.WooCommerce