Introduction:
A Horizontal Product Filter means the arrangement of Filters in a Horizontal way on the webpage. Here, if you are looking for this feature then Woo Choice Plugin (free) provides a free Horizontal Filter feature. This plugin offers an advanced ajax Horizontal Filter for any WooCommerce product page (e.g the Shop page or Category page).
Woo Choice Plugin had grown mature and covered all kinds of requirements for creating advanced and customizable Horizontal filters. Also, you can add Sliders, Buttons, Icons filters, dropdown-based filters, Checkbox-based filters, radio, and the list goes on. Thus, you can cover any kind of advanced or custom requirements using the Horizontal Product Filter.
Thanks to the Jewelry Diamond Industry, the Woo Choice Plugin had matured the Horizontal Filters to its best. Because, Jewelry and Diamond Industry requires advanced and visually appealing Horizontal filters, especially for the Diamond search pages. But, now we are excited to offer this Horizontal Filter for the entire eCommerce industry. Because this filter is very useful and also it can be useful in clothing sites or any other requirements. Lastly, for the clothing, take a look at the Horizontal Filter here.
Advantage:
- It’s Free.
- It’s advanced and fully customizable.
- Easy to use.
- You can customize the design and appearance as per your requirements.
- You can add customize CSS.
How to add Horizontal Filter for WooCommerce Product Module via Woo Choice Plugin?
1. Using Sample Data:
First of all, just Install and Activate Woo Choice Plugin. For Installation and Setup, follow the Documentation page here.
You can follow the above instruction and complete the setup wizard and sample data process. And, you will get filters the same as it is displayed in the snap below.
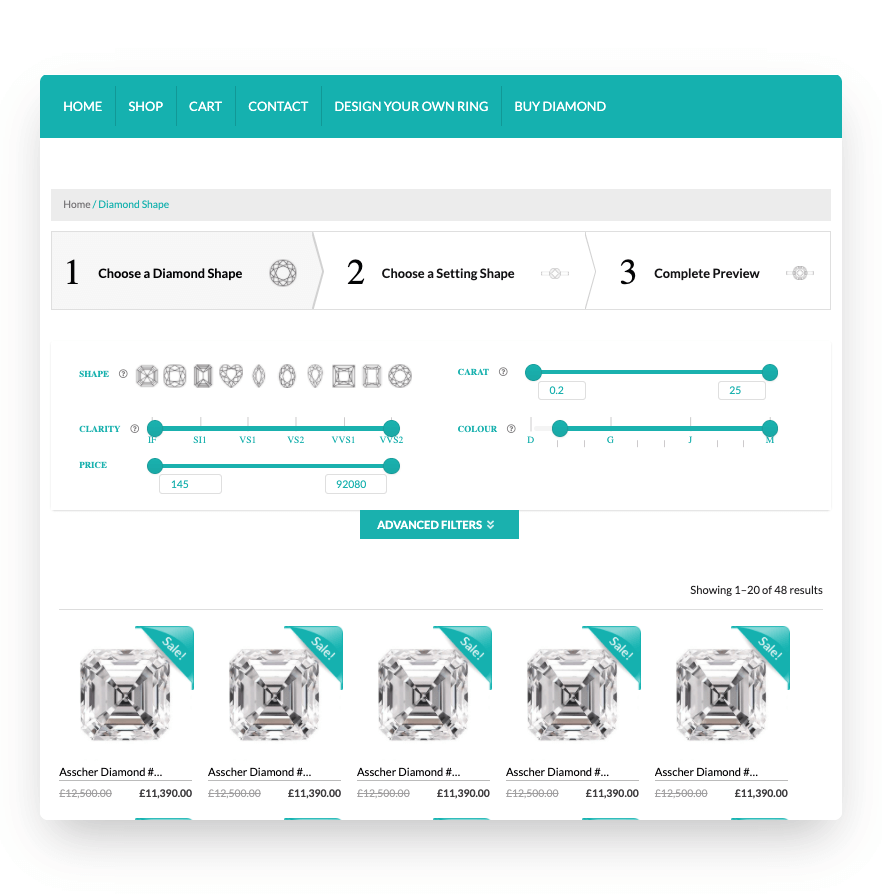
For Diamond/Jewelry:
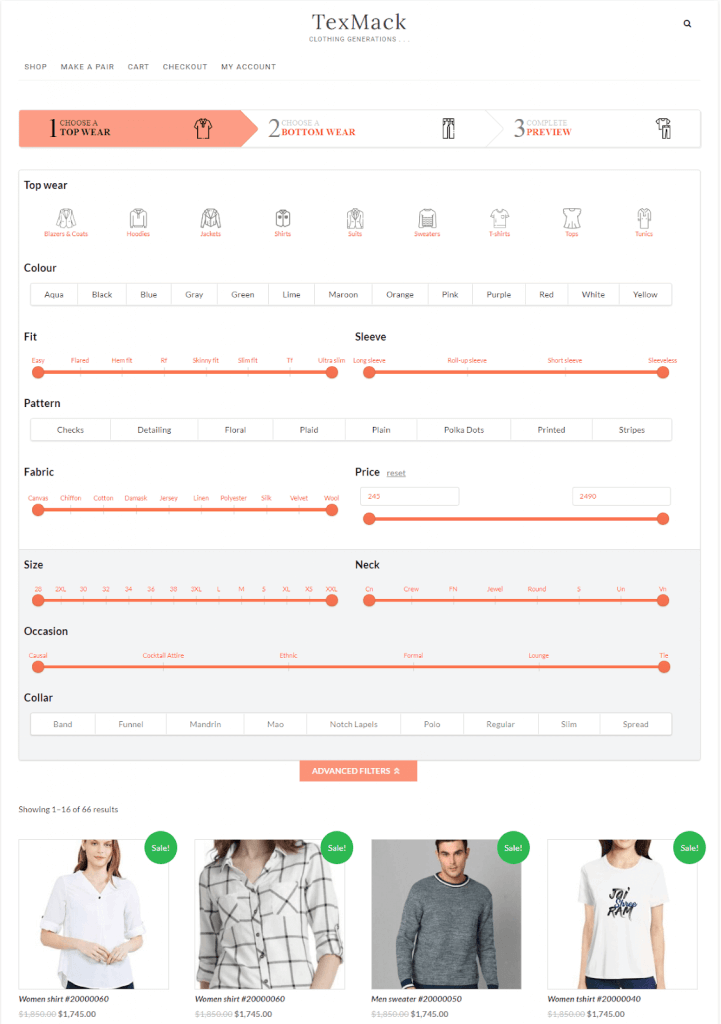
For Clothing:
Otherwise, follow the process using Real Data :
2. Using Your Real Data:
So, just add products data via WooCommerce. And then follow the steps given down below to add or create the Horizontal Product Filter.
Firstly, create one category and add products via WooCommerce.
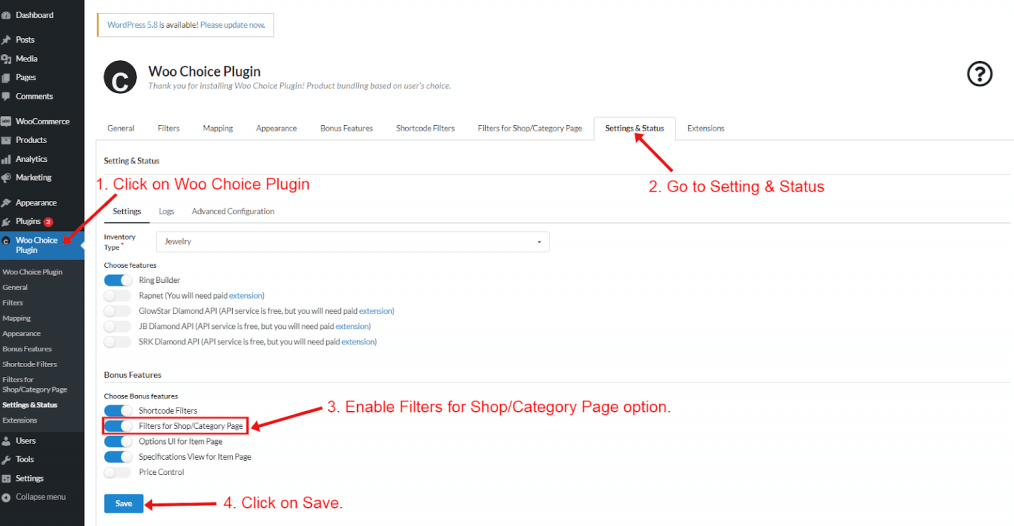
Step-1: Go to the Woo Choice Plugin admin panel > Setting & Status> enable the Filters for the Shop/Category page option. And, you can also follow the documentation of the Shop/Category tab.
Step-2: Go to the Filter for Shop/Category page> Configure tab> Enable the Shop page and Category Page option.
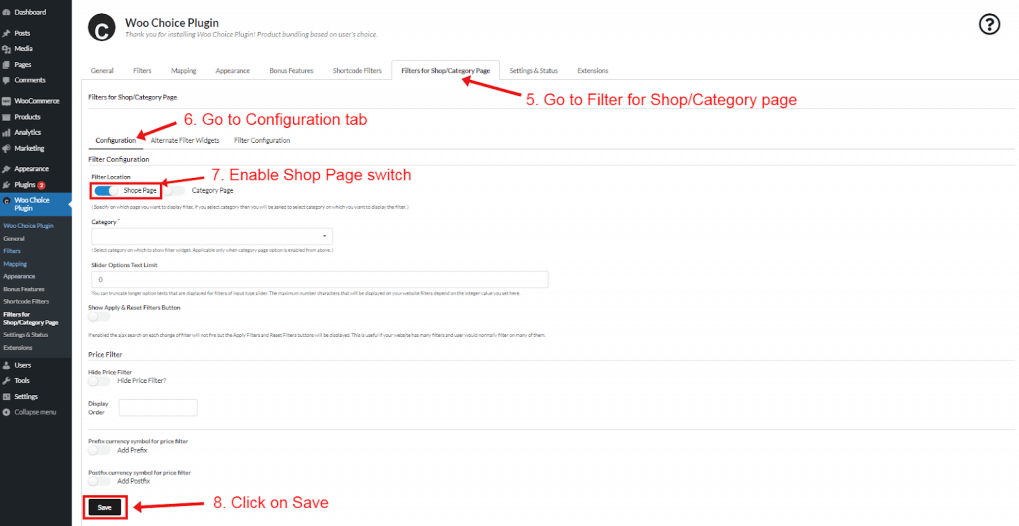
Step-3: Now, go to the Filter Configuration tab (beside the Configuration and Alternate Filter widget tab) and add Filters & configure Filter Fields(which you want to show on the front end of the Shop page or Category or any page).
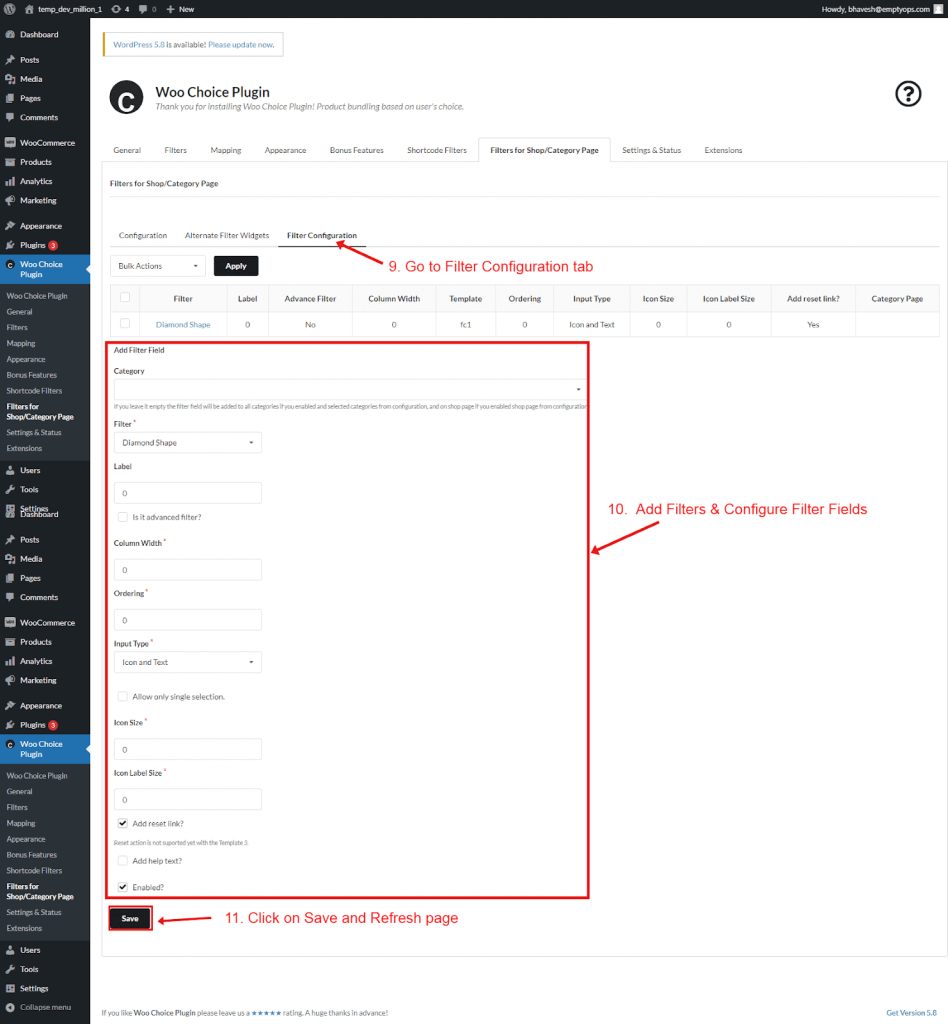
Step-4: Save it and Refresh the page.
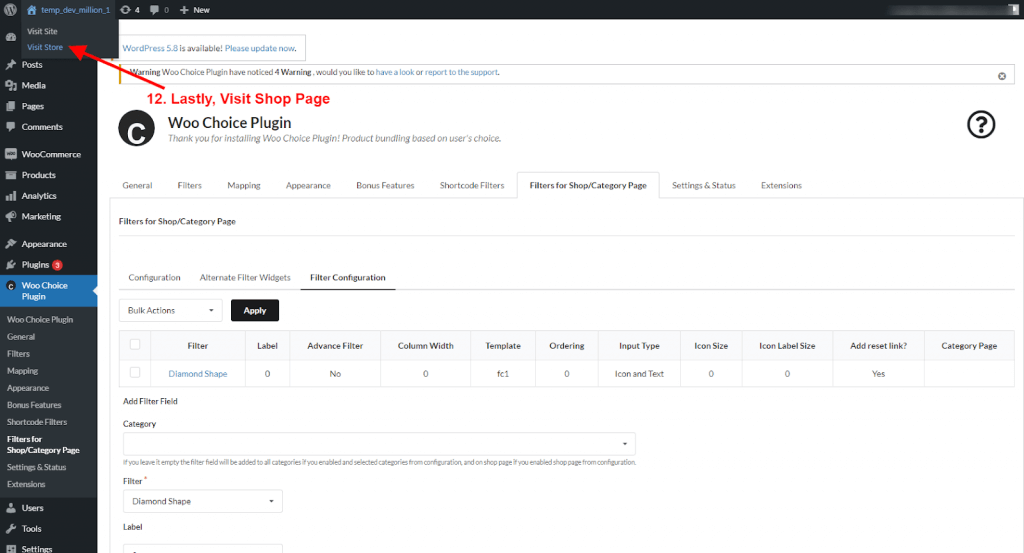
Lastly, the output will look like the number of filters and the kinds of filters you have added for the manual way.
To know more about our plugin and extensions, visit here.

